Showing posts with label tutorial. Show all posts

Wednesday, February 1, 2012

Enchantment Table font change Tutorial

How to change Enchantment Table's font to English

This Tutorial will show you how to change the Enchantment Table's font to English from the standard galactic alphabets. Enchantment Table doesn't have a different language it is English in Galactic alphabets. no translations needed just replace the font to be able to read it.

Note: You won't get the same results if you are using a texture back, Switching to English won't do you any good, you will just be able to read it easily, it won't give you any advantage in getting a good enchantment, the words are random and they have no meaning what so ever.

Follow these steps to switch the Enchantment Table Font:
  • Go to your %AppData% folder. You can do this by opening up your windows explorer (My Computer) and typing %AppData% in the address bar on top or just copy paste this with quotes in run "%appdata%/.minecraft/bin".
  • Only for Windows 7 or Vista you can also go to "C:\Users\<Your Username\AppData\Roaming\.minecraft\bin"
  • Only for Mac go to " /Users/~Library/Application Support/minecraft/bin/"
  • Optional but recommended to backup the Minecraft.jar that you already have by making a copy of it.
  • Open the Minecraft.jar using winrar or winzip and go in the fonts folder.
  • Extract default.png and rename the extracted default.png to alternate.png.
  • Add the alternate.png back to the Minecraft.jar replacing the alternate.png that is already in the Minecraft.jar.
  • You are ready to run Minecraft and test the Enchantment Table.
If you wish to go back to the standard galactic alphabets just replace the Minecraft.jar with the backup you made.

Thursday, January 26, 2012

Out of memory fix Tutorial

This tutorial will show you how you can fix the Minecraft Out of memory error.

If you received the following message then you are at the right place to fix it.


Out of memory!

Minecraft has run out of memory.

This could be caused by a bug in the game or by the Java Virtual Machine not being allocated enough memory. if you are playing in a web browser, try downloading the game and playing it offline.

To Prevent level corruption, the current games has quit.

Please restart the game.

The simplest solution is to go to Control Panel > Java > Java Tab > View > in Runtime Parameters add -Xmx800m {you can also do -Xmx300m (300MB) and -Xmx1g (1GB) etc.} > OK > OK > close control panel and run Minecraft.

If you don't wish to change the memory allocation for all Java programs follow the steps below:


Download Minecraft.jar file and place it anywhere you wish.
http://www.minecraft.net/download/minecraft.jar?v=1313864384895
or download it from http://www.minecraft.net it is under the Linux / Other section


Create a new windows shortcut to run minecraft or just copy and paste this "C:\Program Files (x86)\Java\jre6\bin\java.exe" -Xmx1024M -Xms512M -cp Minecraft.jar net.minecraft.LauncherFrame with the quotations in run to execute Minecraft and you can skip the following steps.


Set "Target" to "C:\Program Files (x86)\Java\jre6\bin\java.exe" -Xmx1024M -Xms512M -cp Minecraft.jar net.minecraft.LauncherFrame

Set "Start in" to be where the .jar file is. Example "C:\Minecraft"

Optional to set "Run" to Minimized

Optianal to "Change Icon" then browse and select minecraft.exe icon.
Optianal to increase memory usage for Minecraft change the first -Xms parameter to something higher.

You can also run minecraft in 64-bit with the above shortcut trick read about it here

Sunday, January 22, 2012

Minecart Mania Control Blocks

Minecart Mania Control Blocks

Note: This only works if the Minecart Mania plug-in is installed on the server of course. most of the control blocks are changed as required and are no longer the default control blocks.

Some basic things and the control blocks:

Booster block (Powered Rails)
to increase the speed of passing Minecarts.
Brake block (Unpowered Powered Rails)
to decrease the speed of passing Minecarts.
Reverse block (White Wool)
to reverse the direction of any Minecart that passes over it.
Ejector block (Iron Block)
to automatically eject the player/mob from the Minecart.
Platform block (Light Green Wool)
to grab nearby players and put them inside of any empty, passing minecart.
Catcher block (Unpowered Obsidian)
to stop a moving Minecart instantly.
Launcher block (Powered Obsidian)
to launch a stationary Minecart.
Spawn block (Brick Block)
to create a new Minecart on the trail above it when activated. it spawns only standard Minecarts, use Minecart Spawner Sign to change what types of Minecarts will be spawned.
Kill block (Soul Sand)
to remove a Minecart from the rail that passes over it.
Station block (Netherrack)
are a special case of Control Blocks. In general, they alone don't do anything, and instead work with Intersection Stations.
Elevator block (Red Wool)
to teleport a minecart that arrives at one end of the elevator block to the next elevator block on the same Y axis level.

Thursday, December 1, 2011

Minecart Mania Tutorial

This Tutorial will show you some of the Minecart Mania techniques, Item Collection, Item Compression, Item Trashing, Item Dispenser, and Furnace Fuel Collection.

Note: This only works if the Minecart Mania plug-in is installed on the server of course.

Some Basics to remember:
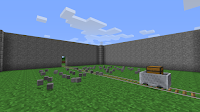

Any Storage Minecart moving or when placed collects any dropped item around it even through walls within 3 blocks on any side.


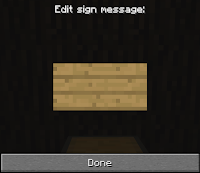
Signs can have the Item ID or Item name, or partial/full names of items.

Signs can be placed within 2 blocks of the chest.

Signs can be placed on either a wall or on the ground whichever you prefer.

If one Sign is not enough, more signs may be used, as long as they are within 2 blocks of the chest.

Do not lock the chest before placing the sign, as this will prevent collection or dispensing.

It is best to use square brackets [ ] on the signs for each line, the plug-in will automatically add square brackets but sometimes it just won't do it.

The '!' Character marks the item from removal from the list. Used commonly with "All Items", it can mark exceptions to the items, so you don't need to list all 5000 item id's, instead, just list the 3 exceptions.
Example:

The '-' Character allows you to mark a sequence of values. Using it with "4-15" would mark all items with id 4, through item 15 (inclusive). Useful for larger groups similar item id's.
Example:


The '+' Character allows you to set a conditional direction. Use '+' Before listing any items in the row, (even works with "All Items" [e.g "E+All Items"]), use the capital abbreviation of the direction, the '+' Character, and list of item id's. This will allow you're minecarts to operate differently, depending on which direction they are moving.
Example:


The ';' Character allows you to set a custom data value for an item or item id. "17;2" would be the equivilent of "Redwood Logs", as redwood is the same id as logs, but uses data value 2. Data values are listed here
Example:


The '@' Character allows you to specify an amount to collect or deposit. For example, "66@30" would only allow 30 rails to be collected or deposited in a minecart each pass.
Example:


Item Collection


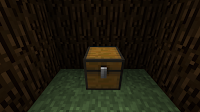
Place a chest or double chest parallel to the rail tracks, when a Storage Minecart passes the chest, the chest will collect the specified items from the Storage Minecart. You can also set-up Collect Items with all Items to stack the items that can't be stacked normally like signs, unused tools, cakes, etc.
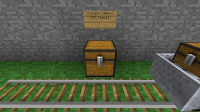
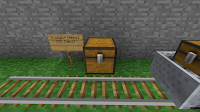

Examples:

First Line: [Collect Items]
Second Line: [All Items]
The Chest will collect all the items from the passing storage minecarts.


First Line: [Collect Items]
Second Line: [3:4:5]
The Chest will collect Dirt, Cobblestone and Woodplank from the passing storage minecarts.


First Line: [Collect Items]
Second Line: [Dirt:Stone]
The Chest will collect Dirt, Stone from the passing storage minecarts.


First Line: [Collect Items]
Second Line: [3:4:5]
Third Line: [Gravel:Stone]
Fourth Line: [Sand]
The Chest will collect Dirt, Cobblestone, Woodplank,Gravel, Stone, and Sand from the passing storage minecarts.


Item Depositing

Chests also can be used to deposit items into passing Storage Minecarts. They can deposit items selectively (only one, or a few types of items) or can attempt to deposit the entire contents of the chest into the passing storage minecart. Chests need to be placed parallel to track, with a sign next to them indicating what is to be deposited. The syntax of the sign is exactly the same as item collecting, except the first line of signs is "Deposit Items" instead of "Collect Items".
Example:

First Line: [Deposit Items]
Second Line: [3:4:5]
Third Line: [Gravel:Stone]
Fourth Line: [Sand]
The Chest will Deposit Dirt, Cobblestone, Woodplank,Gravel, Stone, and Sand to the passing storage minecarts.

Collecting and Depositing

If you want to deposit into the same chest you are collecting from you must use a double chest with non overlapping signs. This is extremely useful when combined with a deposit amount to give a cart a set number of saplings for tree replanting, then to collect the remaining ones on the way back out.

These signs must be placed next to an existing collection or deposit sign in order to function.


Maximum Items
Collecting and Depositing items is all well and good, but sometimes you don't want TOO many of one item. You can limit particular items to a certain amount by using "Max Items" on a sign, follow by a list of items and amounts.
Example:

First Line: [Max Items]
Second Line: [Coal@64:Stone@1]

Minimum Items
Or, perhaps you want to always have a minimum amount of items in your minecart. Use a "Min Items" sign to prevent minecarts from having too much material collected from them.
Example:

First Line: [Min Items]
Second Line: Coal@64:Stone@1

Dispensers

Storage Minecarts can also be recipients or donors for Items. Dispensers use exactly the same signs that chests do for collection and depositing. 

Furnace Collection

Furnaces can use the same deposit signs and collection signs as chests as well, but this is not recommended. Instead, furnaces have custom signs that allow you to set what items are collected for fuel, and what items are collected for smelting. Use "Fuel: coal:log" to use coal and logs from passing storage minecarts as fuel for a furnace. "Smelt: 4" will smelt cobblestone collected from passing storage minecarts. Then, use deposit signs to collect the items that has been processed by a furnace. 
Example:

First Line: fuel:coal:log
Furnace will only collects fuel, and does not smelt anything.

First Line: [Deposit Items]
Second Line: [265:266]
Third Line: [fuel:coal:log]
Fourth Line: [smelt:14:15]

This sign would have any passing storage minecart collect processed gold and iron ingots, deposit any coal or logs into the fuel slot of the furnace, and deposit any gold or iron ore into the smelting slot of the furnace.

Trashing Items

Sometimes your storage minecarts will get filled with items that have no particular value to you. You can remove these items by having the Storage Minecart pass a sign with "Trash Items" on it. Trash Item signs follow the same syntax as item collection and item depositing items.
Example:

First Line: [Trash Items]
Second Line: [Sapling@64]
Sapling will be trashed from the passing Storage Minecarts.

Item Compression

Once smelted items are collected, they can be compressed with the help of an additional sign and a workbench adjacent to the passing rail line. Place the sign near the workbench, and the workbench directly parallel to the rail line. On the sign, write on any line "compress items". Any gold or iron ingots will be automatically compressed into gold and iron blocks. Leftovers will remain as they are.
Example:

First Line: Compress Items

Friday, November 18, 2011

Protection Tutorial

Before we get into the nitty gritty details of the tutorial First of all we need to understand why we protect and learn a few of the basic commands, The only way to fully prevent accidents and greifing is area protection, because people tend to be clumsy and accidents happen from time to time, we use the combination of WorldEdit and WorldGuard to fullfill our protection needs.

Note:
On Our Minecraft Server the protection commands can only be performed by the Moderators (Mods) or by an Administrator (Admin) so if you are a Member or a VIP please contact a Mod to setup the protection for you.

Following are the basic commands you need to know:
//wand
Gives you the "edit wand" (by default, a wooden axe). Left click with this tool to select position 1 and right click to select position 2.

/region define
Syntax: /region define <id> [<owner1>[<owner2> [<owners...>]]]
Example: /region define AreaName RobinR or /region define GAMall FearTheGame OCALIEN
To define a region with a specific ID or Name for a specified player.

/region flag
Syntax: /region flag <id> <flag> [<value>]
Example: /region flag AreaName mob-spawning deny or /region flag Mall mob-spawning deny
Example: /region flag AreaName mob-spawning allow or /region flag Mall mob-spawning allow
Example: /region flag AreaName greeting message or /region flag Mall greeting Welcome to the Mall
Example: /region flag AreaName farwell message or /region flag Mall greeting Thank you for visiting the Mall
To flag the specified region with the desired value, if you intend to make it a mob spawning region, you need to setup a welcome message indicating this region has mobs enabled.

/region info
Syntax: /region info [<world>] <id>
Example: /region info AreaName or  /region info Mall
To get info of the specified region.

/region remove
Syntax: /region remove <id>
Example: /region remove AreaName or /region remove Mall
To remove the specified region.

/region addmember
Syntax: /region addmember <id> <member1>[<member2> [<members...>]]
Example: /region addmember AreaName FearTheGame or /region addmember GAMall FearTheGame OCALIEN
To add another member or a number of members to the already defined region.

/region remmember
Syntax: /region remmember <id> <member1>[<member2> [<members...>]]
Example: /region remmember AreaName FearTheGame or /region remmember GAMall FearTheGame OCALIEN
To remove a member or a number of members to the already defined region.

To easily understand a cuboid area think of a 3D Box shape or a Shoe Box, Follow the steps bellow to protect an Area, Structure, Region, or a Cubiod:
  1. Type //wand command to get the magic tool. To select an area, region or cuboid, no matter how big or small, you need the magic tool to get it type //wand command, you will get a wooden axe. 
  2. Left click the first point (Point 1) of the cuboid. Left click the bottom left front corner block of the structure or area to select the position one. 
  3. Right click to select the diagonal second point (Point 2) of the cuboid. Right click the top right back corner block of the structure or area to select the position two.
    If you have followed the instructions correctly you have selected a cuboid area you are now ready to type a command.
  4. To cover the entire area, from bedrock to sky, type //expand vert. 
  5. Type /region define Mall RobinR Waelz to define a region named Mall with players RobinR and Waelz.
  6. The region can now only be modified by RobinR and Waelz.


for easy understanding the two blocks/points that you have to set-up are A and G.


Sunday, November 6, 2011

How to setup your own Chest Shop

Looking for some enchantment codes/ids? try the all new enchantment code/id generator

This tutorial will show you how you can setup your own Chest Shop to sell items to other player or buy from them.
Note: This only works if the ChestShop plugin is installed on the server of course.

Find a good location for your Chest Shop Preferably near a populated area or in a market or a mall.


Place a chest and then Place a sign above the chest.


On the sign Type with the following syntax format:

<Blank or Player Name or Your Name>
<Quantity of the Item to Buy and Sell>
B <Buy Rate> : S <Sell Rate>
<Item Name or Item ID >

Examples:
RobinR
64
B 76800:S 38400
Clay
RobinR is selling 64 Clay at the rate 76800 and he will buy at the rate 38400
OR
RobinR
64
B 76800:38400 S
Clay
RobinR is selling 64 Clay at the rate 76800 and he will buy at the rate 38400
OR
RobinR
32
B 38400
Clay
RobinR is selling 32 Clay at the rate 38400 only and would'nt buy any
OR
RobinR
1
S 1200
82
RobinR is buying 1 Clay at the rate 1200 only and would not buy any
OR
RobinR
64
S free
Clay
RobinR is buying 64 Clay for free
OR
64
76800:38400
82
RobinR is selling 64 Clay at the rate 76800 and he will buy at the rate 38400
OR
RobinR
64
0:38400
Clay
RobinR is buying 64 Clay for 38400 while he is not selling any.
When the first line is left blank your name will be automatically appear.
You don't need to type B or S if you mention both buying and selling rates. B and S will automatically appear.
If you type 0 as the rate to sell or buy, then selling or buying will not be allowed from the Chest Shop.
B is the rate/price a player buy things FROM YOU.
S is the rate/price a player sell things TO YOU.


Shop Successfully Created!, But it would only buy any item from other players and wouldn't sell any item.


To let other players buy from this chest shop you need to put some stock in your shop, so fill in the chest with at least as much quantity of the item you typed above to sell.


Place some of the items you wish to sell in the chest from your inventory, you will need to fill again if and when you are out of stock meaning you have sold all of the item you had in the chest.

 And your Chest Shop is ready for business.


You can sell to shops by left-clicking on the sign with any tool or empty handed, and buy from them by right-clicking on the sign.

You can also set to selling mode by typing /chest sell or /chsell.

Of course you will not be able to trade from your own shop.
If you wish to delete or remove your sign shop simply remove the chest first and then the sign above it, if you want to just remove the sign for editing or any other reason you can use SNEAK (hold left shift key to sneak) and then destroy the sign.

After you have setup the shop you can lock the chest by using the /cprivate command.

Sunday, October 30, 2011

Downgrading Minecraft Made Simple

When you have accidently updated to the latest version of Minecraft and you don't even have a backup of the old version and you really wish to play the old Minecraft version. you will need to downgrade Minecraft, Unfortunately downgrading Minecraft can be a little frustrating! but is not so hard to do, you can visit our Minecraft Downgrade Tutorial page for some usefull and updated info.

Monday, October 24, 2011

Panoramic View Tutorial

Note: This post is nothing about the Movie Paranormal Activity or about the Paranormal nor about Paranormal Phenomena.

To understand Panoramic it is best you read about it on the wiki Linkylinklink,
"An image showing a field of view approximating, or greater than, that of the human eye – about 160° by 75° – may be termed panoramic. This generally means it has an aspect ratio of 2:1 or larger, the image being at least twice as wide as it is high. The resulting images take the form of a wide strip. Some panoramic images have aspect ratios of 4:1 and sometimes 10:1, covering fields of view of up to 360 degrees. Both the aspect ratio and coverage of field are important factors in defining a true panoramic image."

A panorama can be defined as a wide-angled view of any space, field or structure.  A panorama is usually made from several photographs/screenshots that are merged together to create a picture/image.

Robin's The Great Hall (Inside Panoramic View)


Follow the steps below to create an panoramic image of any structure in Minecraft.
  • Set the screen resolution. It is best to set your Monitor/LCD screen resolution to as high as you can, to get the best quality screenshots for your panoramic view.
  • Set Minecraft to fullscreen mode. press F11 to toggle fullscreen mode. you can use ALT+TAB to switch out of Minecraft AND switch it back to windowed mode.
  • Stand still and mark where you will be standing. mark with any block type. it is best to place another block directly behind you so that you can't move back.
  • Start from the extreme left side of what you want to capture. move and adjust your view by moving the crosshair with the mouse only, keep the crosshair at an specific height.
  • Take a few screenshots by pressing F2. Press F1 to toggle the Heads Up Display (hide the crosshair, inventory etc.), check the screenshots if you are satisfied with it then move on. if not goto step one. The screenshots are saved in
    o   %appdata%\.minecraft\screenshots on Windows
    o   ~/Library/Application Support/minecraft/screenshots in OS X
    o   ~/.minecraft/screenshots in Linux.
  • Choose a reference point, move the crosshair from left to right. Press F1 to toggle the crosshair, Choose a reference point a tree or a specific block the reference point should be in the previous screenshot, Move the crosshair from left to right keeping atleast 20% to 30% of the view that you have already taken a screenshot of, we need the images to overlap, do not move your cursor in the vertical (i.e. up or down) direction. If you don’t overlap enough, as Adobe Photoshop’s Photomerge tries to blend and merge the shots it wont be able to blend them well, resulting in a messy image. take a few screenshots.
  • Follow the above step as many times as you'll need to capture the whole structure.
Alien's Temple (Inside Panoramic View)


Now merge all the screenshots together using Adobe Photoshop.
  • Open all the screenshots that you wish to add to your Panorama in Photoshop.
  • In Photoshop go to File > Automate > Photomerge
  • In the dialog that appears choose Auto and then click the “Add Open Files” button
  • Check the filename numbers of the photos that are added, The images in the list should be in correct order, meaning the extreme left screenshot or our first screenshot should be listed on top then the next screenshot you took and so on, till the extreme right or final screenshot at the bottom of the list.
  • Click Ok to start the photomerge process. if you followed the steps correctly you should have a panoromic view of your structure by now.
  • Crop and adjust as you need and save it.
The GNU Image Manipulation Program - GIMP

As the name explains GIMP is a free way to manipulate/edit images. GIMP it self doesn't have a builtin photomerge option, you can however download plug-ins to do the magic for you.


click here to download
tutorials
documentation


Stitch Panorama: a GIMP Plug-in
Stich Panorama is a plug-in for the GNU Image Manipulation Program (GIMP) which takes digital images and overlays one atop the other to make a panorama.
click here to download
documentation and tutorial (PDF)
examples

Pandora: a GIMP Plugin for Making Panoramas

Pandora is a GIMP script which helps in stitching together multiple images to make a panorama.

click here to download
tutorial


phfluuh is a software package consisting of two gimp plugins (lineup and enfish) which allows you to make panorama images without too much trouble.
click here to download
documentation and tutorial
examples

Hugin - Panorama photo stitcher
Hugin gives you an easy to use cross-platform panoramic imaging toolchain based on Panorama Tools. With Hugin you can assemble a mosaic of photographs into a complete immersive panorama, stitch any series of overlapping pictures and much more.
click here to download
documentation
tutorials

Saturday, August 20, 2011

Run Minecraft 64-bit Tutorial

If you have a 64-bit windows you can take advantage of it by running Minecraft in 64-bit just follow the instructions below, I am not sure if it boasts any performance at all.

Download 64-bit java and install it.
http://javadl.sun.com/webapps/download/AutoDL?BundleId=49026
or download it from http://www.java.com/ you will need to use a 64-bit browser or click on see all java downloads here http://www.java.com/en/download/manual.jsp

Download Minecraft.jar file and place it anywhere you wish.
http://www.minecraft.net/download/minecraft.jar?v=1313864384895
or download it from http://www.minecraft.net it is under the Linux / Other section

Create a new windows shortcut to run minecraft or just copy and paste this "C:\Program Files\Java\jre6\bin\java.exe" -Xmx1024M -Xms512M -cp Minecraft.jar net.minecraft.LauncherFrame with the quotations in run to execute Minecraft and you can skip the following steps.

Set "Target" to "C:\Program Files\Java\jre6\bin\java.exe" -Xmx1024M -Xms512M -cp Minecraft.jar net.minecraft.LauncherFrame

Set "Start in" to be where the .jar file is. Example "C:\Minecraft"

Optional to set "Run" to Minimized

Optianal to "Change Icon" then browse and select minecraft.exe icon.
Optianal to increase memory usage for Minecraft change the first -Xms parameter to something higher.

Monday, April 25, 2011

Minecraft Downgrade Tutorial

This tutorial is created to help you downgrade since it is asked so much. One reason for downgrading is when Mojong releases a Minecraft update, we have to wait for the plug-ins to update, So while you wait you can still play on the downgraded server like you always did. Unfortunately this requires you to downgrade your Minecraft which can be a little frustrating! but is not so hard to do. Currently Our Minecraft Server is running version 1.1.


Disconnected by Server
Outdated Server!

While joining Our Minecraft Server if you see this screen then you need to downgrade Minecraft in order to play on our server.


Follow these steps to Downgrade Minecraft:
  • Download the version you wish to downgrade to from the version list below.
  • Go to your %AppData% folder. You can do this by opening up your windows explorer (My Computer) and typing %AppData% in the address bar on top or just copy paste this with quotes in run "%appdata%/.minecraft".
  • If you are on Windows 7 (or vista) you can also go to "C:\Users\<Your Username\AppData\Roaming"
  • If you are on a Mac go to " /Users/~Library/Application Support/minecraft/bin/"
  • Backup your the Minecraft.jar you already have, Place the downloaded Minecraft.jar in the ".minecraft/bin/" folder and be sure to make a backup of the current minecraft.jar
  • If needed rename the downloaded JAR file to "minecraft.jar" after deleting or moving the old one.
  • Now you are ready to play on downgraded server, When asked "Would you like to update?" click on "Not now" button.
Always try to keep a backup of the bin folder just in case.


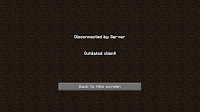
Disconnected by Server
Outdated Client!

While joining Our Minecraft Server if you see this screen then you need to update Minecraft in order to play on our server.


Minecraft Single Player Codes
MCPatcher
MC Downgrader - The Time Machine for Minecraft!

Minecraft 1.1-  Current
Minecraft 1.0.1 - Outdated
Minecraft 1.8.1 beta - Outdated
Minecraft 1.7.3 beta - Outdated
Minecraft 1.6.6 beta - Outdated
Minecraft 1.5_01 beta - Outdated
Minecraft 1.4_01 beta - Outdated
Minecraft 1.3 beta - Outdated


New update available
Would you like to update?
[Yes] OR [Not now]

While Minecraft opens if you see this screen then you should click on Not now Button to play on our downgraded server, However if you find that you have an outdated client then you should click on Yes button to play on our server.


There is an updated launcher for Minecraft which gives you a choice to update or not, you can download it from Minecraft.net, you should also keep the old launcher just in case (sometimes the new launcher fails to log-in) you can prevent/block the old launcher from upgrading simply by replacing the old version file "%appdata%\.minecraft\bin" with the latest one.

Please report any broken links in the comments or by email minhajarefin79@gmail.com